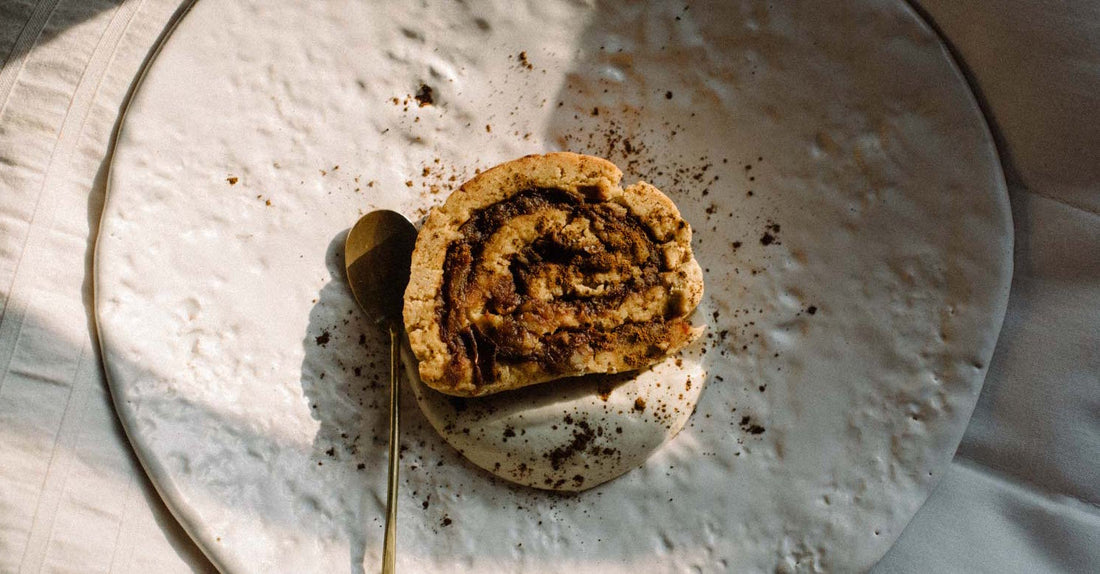
Chaga Cinnamon Buns
Ingredients
This recipe is adapted from Minimalist Baker!
Dry:
- 2 cups gluten free flour blend
- 3/4 cup almond flour
- 2 1/2 tsp baking powder
- 1/2 tsp sea salt
- 4 tbsp coconut oil, cold
- 2 tbsp coconut sugar
Wet:
- 3/4 cup chaga tea
- 2 tbsp forest juice maple syrup infused with medicinal mushrooms
- 1 tbsp coconut oil
- 1 packet active dry yeast (Fleischmann’s active dry original)
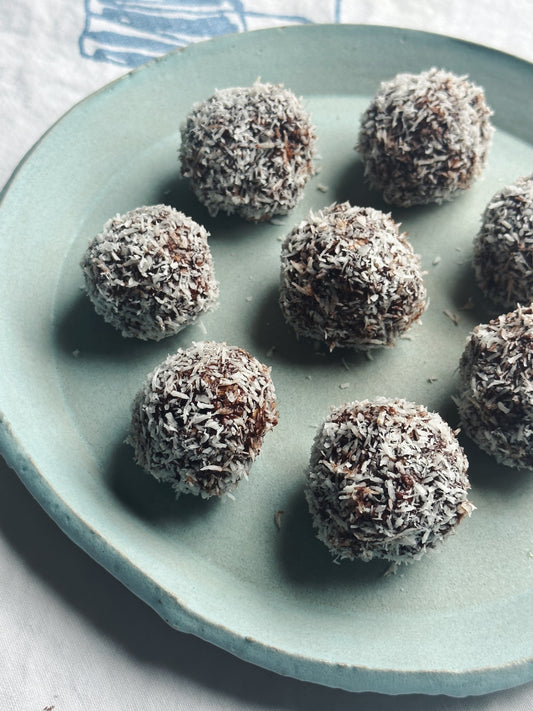
Filling:
- 3 tbsp melted coconut oil
- 2/3 cup dates, soaked
- 1 tbsp Indonesian ceylon cinnamon (the real stuff!)
Cashew Glaze:
- 1 cup cashews, soaked 8 hours
- 1/2 lemon, squeezed
- 5 droppers 11:11 tincture
- 1 tbsp forest juice maple syrup infused with medicinal mushrooms, or to taste
Directions
- Preheat oven to 350 degrees F and oil a round baking dish. Set aside.
- Heat chaga tea on the stovetop to the temperature of warm bath water - approximately 110 degrees F (43 degrees C). Be careful not to exceed that temperature or it can kill the yeast.
- To the chaga tea, add the coconut oil and maple syrup and stir melt. Then add yeast and stir once more. Set aside (uncovered) to for 10 minutes, or until it appears puffy on the surface (this indicates the yeast is activating. If it hasn’t activated at this point, either your yeast was expired or the liquid was too hot or not hot enough).
- Meanwhile in a medium mixing bowl whisk together gluten free flour blend (including xanthan gum), almond flour, coconut sugar, baking powder, and sea salt. Then add cold coconut oil and use a fork or pastry cutter to mix or “cut” into the dry mixture. It should resemble the texture of wet sand.
- To the dry ingredients, add the chaga tea-yeast mixture a little at a time and stir. A dough that resembles moist (not crumbly) cookie dough should form. Add more of the wet mixture as needed. If it gets too wet and tacky (you should be able to form it into a ball when rolled), add more almond flour or GF flour blend. Set aside.
- Get a large cutting board and place a silicon baking sheet down on it. Then dust the surface generously with gluten-free flour.
- Add the dough in the center of the board and sprinkle with more gluten-free flour. Then top with a sheet of parchment paper and tuck down around the edges of the cutting board (so it stays in place). Use a rolling pin to roll the dough out into a large, thin rectangle. The dough should be about 1/8th-inch thick.
- Carefully remove the top layer of paper and brush on the coconut oil. Then spread the date and cinnamon and spread gently with fingers to evenly distribute. Then, using the bottom layer of silicon sheet from the cutting board and use it to tightly roll the dough lengthwise into a cylinder.
- Use a serrated knife or floss to cut into even rolls. Then carefully transfer to the prepared pie dish or cake pan (they can be fragile to transfer).
- Cover a towel and set on top of the warm oven and let rise for about 30 minutes, or until the rolls have risen slightly and are touching (or close to touching) - they won’t get as voluminous as gluten-containing rolls, but they will puff up a bit!
- Remove towel and place rolls on the center rack of your oven and bake for 30-35 minutes, or until tops are golden brown and the rolls have risen/expanded quite a bit. While the rolls bake, you can prepare a frosting / glaze (optional).
- Let the rolls cool at least 20 minutes before frosting (optional), then enjoy! Store leftover rolls covered at room temperature up to 3-4 days or in the freezer up to 1 month. See notes for make-ahead cinnamon rolls to store in the freezer (unbaked).